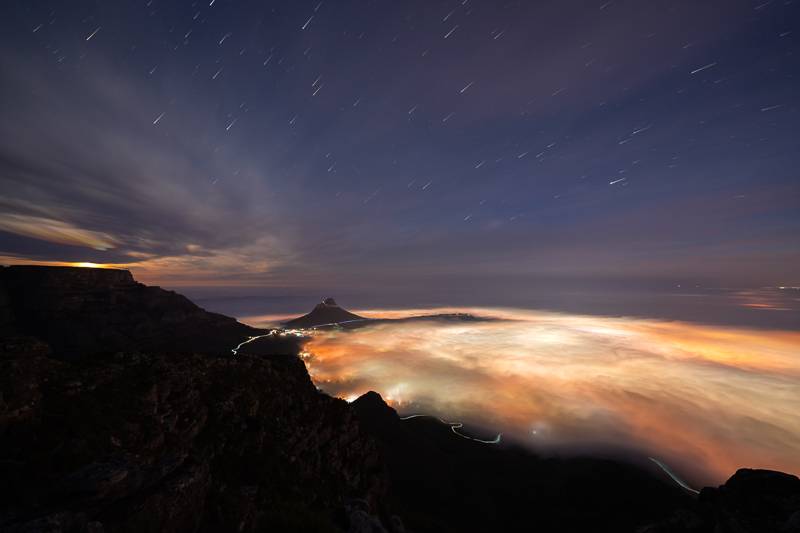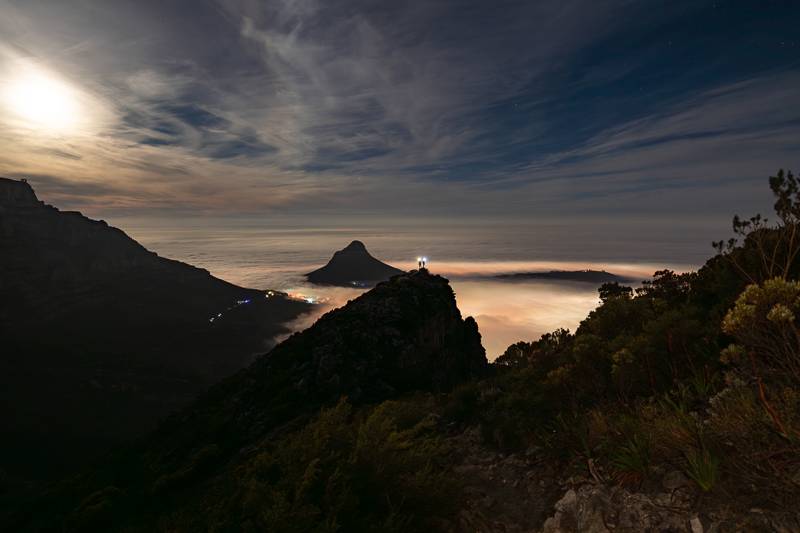
Living in Cape Town has many perks, but for someone like myself who loves spending time in the outdoors, it is the perfect playground for me to run, hike and of course, capture time-lapses when there are low clouds or otherwise known as “cloud inversions” over the city.
Since 2011, I have so many memorable moments of the low clouds pouring into the city and have had many of my Instagram and TikTok posts go viral, especially the long exposure time-lapses that I have captured from many overnight hikes into Table Mountain National Park.
Because of my obsession for time-lapse, I have become somewhat a Master of time-lapse and I have taught on the subject extensively at my photography workshops with Sony Alpha SA over the last 5 years.
Frequently Asked Questions on Social Media
One of the most frequently asked questions about my time-lapses at these talks, and via DM on social media, is “How do you know when the clouds are coming into Cape Town” and then the second most asked question is, “How do you create those time-lapses”.
So it seems, there are loads of people out there keen to learn my secrets, which is why I have dusted off my keyboard to start writing again, and my first article is about how to perfectly capture a low cloud time-lapse in Cape Town.
How to perfectly capture a low cloud time-lapse
I’ll break this article down into 3 parts. “How to read the weather“, “What are the camera settings I use for time-lapsing low clouds“, and another frequently used question, “What are my favourite locations to capture time-lapses“.
1. How to read the weather to predict the low clouds?
There are so many ways to check the weather in Cape Town, including ways you can check if there are actually low clouds on the morning of your hike.
YR.NO
Bookmark this link to yr.no which will take you to a detailed view of the weather for Cape Town, which is broken down into many columns, including my most important, “Wind Speed”, “Low %” & “Fog %”. If the wind direction is in a Northerly Direction (which it is in the example below) and you have a prediction for Low Cloud AND Fog, there is a great chance the conditions will be perfect. But the next step is to check height of the clouds.

WINDY.COM
Download the Windy app to your phone or visit the Windy Website and view the fog map. This will give you an idea of the height of the clouds and if they are below 400m, pack your bags because you are going hiking in the morning.

Table Mountain Panoramix Camera
Another useful link to bookmark would be to the Table Mountain Panoramix Live Webcam situated at the top of the upper cable station. The great thing about this live camera that updates it’s image every 10 minutes is that it displays a full panoramic image in high definition, which covers the entire 12 apostles mountain rage and all the way to Devils Peak.
You can scroll back and forth in time to see what conditions look like live and back in time.
If you can see low clouds over the city when you wake up at 3am, get out of bed, make some coffee and RUN!!! Conditions change quick, take my word for it.

2. What are my camera settings for time-lapsing low clouds?
If you would like to capture a low clouds sunrise, clouds during the day or a night time-lapse, each have their own settings depending on the speed of the clouds.
Sunrise / Sunset time-lapse settings:
Because the light will change dramatically during your time-lapse, and also why a day-to-night / night-to-day time-lapse (otherwise known as the Holy Grail time-lapse) is regarded as the most difficult to shoot in Manual, I only ever shoot these time-lapses in Aperture Priority.
- Camera Mode: Aperture Priority
- Aperture: f/2.8 to let as much light in when its dark
- Shutter Speed: This is controlled by the camera automatically in Aperture Priority
- ISO: AUTO ISO – My Sony A7RV allows me to set the MIN ISO and MAX ISO in the AUTO settings, so I set it to ISO100 – ISO800
- Intervals: Set your intervalometer to shoot whichever speed is going to capture the clouds property. If they are moving fast, try set your max interval to 3-4 seconds, so that when you move from night to sunrise and your shutter is no longer shooting long exposures, you will have an interval which will allow the clouds to look smooth instead of flowing in fast forward.
Time-Lapse Settings: Shooting at night vs. Shooting during the day:
When the light is fixed, like during the day and at night, its better to always shooting Manual as this gives the most control over a time-lapses and also reduces the risk of flicker in any time-lapses.
Shooting during the Day:
- Camera Mode: Manual Mode
- Aperture: Between f/5.6 and f/8 so that I can get as much of my frame in focus, including the subject which is usually Lions Head.
- Shutter Speed: Depending on the light, I will adjust accordingly to exposure correctly.
- ISO: ISO100 because it is during the day.
- Intervals: Again, this depends on the speed of the clouds. If they are moving fast, then your interval should be between 1-3 seconds. If they are moving really slowly, then shoot every 5-7 seconds.
Shooting at Night:
- Camera Mode: Manual Mode
- Aperture: Shoot as wide as possible. All my Sony lenses are f/2.8 lenses so I shoot all my night shots at f/2.8. If your lens is a higher aperture, shoot at the lowest and compensate with shutter speed.
- Shutter Speed: Depending on the light coming off the city and how much of the stars I want to capture, I will adjust my shutter speed to anything from 5sec to 15sec.
- ISO: I usually shoot between ISO800 and ISO1250 depending on how bright the city is and howling the shutter will be open.
- Intervals: I go off this rule personally, but everyone is different. If my shutter speed is set to 5sec, I will make my intervals 5 seconds. If it is 10sec shutter speed, then my intervals are 10sec. Etc.

3. Where are some of my top locations to capture low clouds?
Cape Town is FULL of epic spots to hike and capture a low cloud time-lapse, but choose your location wisely because weather does change and your photo adventure could come to an end within minutes of you arriving at your location because the low clouds lifted and your stuck inside the cloud.
This has happened to me more times than I can remember… It is what it is.
- Lions Head: This is my favourite mountain and location to capture Table Mountain, Signal Hill, the CBD and Camps Bay. Lions Head has a knack of being covered completely by the clouds, but also a GREAT spot when it doesn’t.
- Kloof Corner Beacon: This is a tricky one because it is lower than Lions Head and if the clouds come in, you can get covered, but this has been my go to for YEARS.
- 12 Apostles Mountain Range: There are loads of spots along the Apostles, but my favourites are Falcon Cracks, Tranquility Cracks and Llandudno Ravine to Pimple Point.
- Devils Peak: This has a GREAT vantage point because it has a panoramic view of the entire city, Lions Head, Table Mountain, back towards Newlands and all the way to Cape Point as well as Gordons Bay. It’s tough as hell with a heavy pack, but worth it when you get there. It is also the riskiest hike because it has the biggest change of getting engulfed in a cloud if wind changes direction.

That is it, those are all my tips on location, camera settings and how to check if conditions are perfect to head onto the mountain to capture a low cloud time-lapse. If you manage to stack some bangers and you post them to social media, make sure to tag me. I go by @LifeOfMikeZA across all platforms.
